Difference between revisions of "Code Review Tool"
m (→Logging In) |
|||
| Line 30: | Line 30: | ||
Once you have a local copy of the change, there are two ways to post it for review: | Once you have a local copy of the change, there are two ways to post it for review: | ||
* [[# | * [[#manually upload patch|manually upload patch]] using the web page interface | ||
* [[#post-review|post-review]] command line tool | * [[#post-review|post-review]] command line tool | ||
Either way, you must [[#Publish Your Review|Publish Your Review]] before any other users will be able to see it or comment on it. | Either way, you must [[#Publish Your Review|Publish Your Review]] before any other users will be able to see it or comment on it. | ||
=== | ===manually upload patch=== | ||
To create a patch file that shows your change, execute the following command from the top level of your repository: | To create a patch file that shows your change, execute the following command from the top level of your repository: | ||
| Line 41: | Line 41: | ||
where ''commit'' is the revision identifier for your change (if you have not made any other changes, this can just be <tt>tip</tt>). If you have not committed your change, you can leave off the <tt>-r ''commit''</tt>, but this is not recommended. | where ''commit'' is the revision identifier for your change (if you have not made any other changes, this can just be <tt>tip</tt>). If you have not committed your change, you can leave off the <tt>-r ''commit''</tt>, but this is not recommended. | ||
Follow the '''New Review Request''' link to begin manually creating a review: | |||
[[Image:Reviewboard.newreview.png]] | |||
This takes you to the form that lets you upload your patch: | |||
[[Image:Reviewboard.uploadpatch.png]] | |||
Select the repository from which you forked/cloned your working repository (making the wrong choice here increases the chance that the patch will not apply cleanly), and upload the <tt>PATCH</tt> file in the '''Diff''' field. You usually will not need the '''Parent Diff''' upload field, and can leave it empty. Then push the '''Create Review Request''' button to upload your patch and create a Draft Review: | |||
[[Image:Reviewboard.draftreview.png]] | |||
Fill out each of the fields: | |||
;Groups | |||
:Enter '''viewer''' (it will auto-complete) | |||
;Bugs | |||
:The identifier for the Jira issue this relates to (this becomes a link to the issue, but you just need to provide the key) | |||
;Description | |||
:Describe the fix, not the issue | |||
;Testing Done | |||
:Optional, but very nice if you can provide useful information here. | |||
You must [[#Publish Your Review|Publish Your Review]] | |||
===post-review=== | ===post-review=== | ||
Revision as of 14:49, 14 December 2010
- Given enough eyeballs, all bugs are shallow
- - Linus' Law, according to Eric S. Raymond
Linden Lab maintains an instance of the ReviewBoard code review tool at codereview.secondlife.com to be used for reviewing any proposed changes to any of our open source projects.
Use of this system is limited to developers who have executed a Second Life Viewer Contribution Agreement. Any changes or comments posted to the tool are Contributions as defined by that Agreement.
Logging In
Access to the system requires that you set up an account, which you can do on your own from the login page or by going directly to the account registration page.
When creating your account:
- Please use the same user id that you use for Jira.
- Use the same email address that you use for the opensource-dev mailing list (if you do not, then the notices of reviews you post and comments you make will not be successfully sent to the list).
- Select the 'Viewer' group
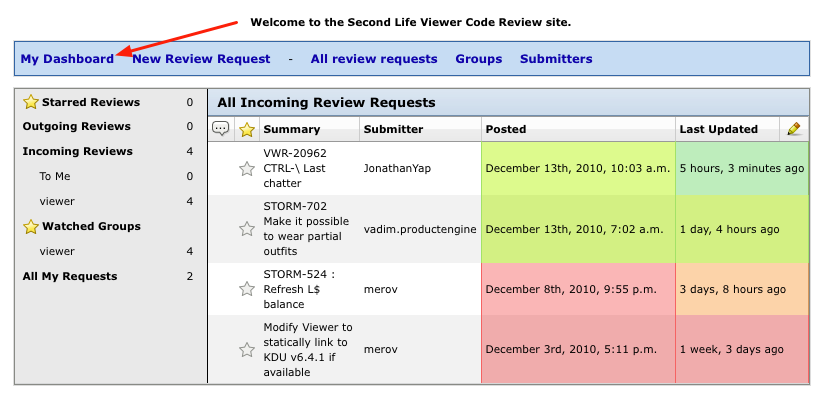
You may find yourself on the account creation screen again after you log in, if so, just follow the My Dashboard link:
The Dashboard displays reviews and lets you select the ones of interest to you. See the full Dashboard documentation.
Post Code To Be Reviewed
Prepare your change in a local working hg repository. It will be easier to keep track of outstanding reviews if you commit your change to that repository before posting it for review.
Once you have a local copy of the change, there are two ways to post it for review:
- manually upload patch using the web page interface
- post-review command line tool
Either way, you must Publish Your Review before any other users will be able to see it or comment on it.
manually upload patch
To create a patch file that shows your change, execute the following command from the top level of your repository:
hg diff -r commit > PATCH
where commit is the revision identifier for your change (if you have not made any other changes, this can just be tip). If you have not committed your change, you can leave off the -r commit, but this is not recommended.
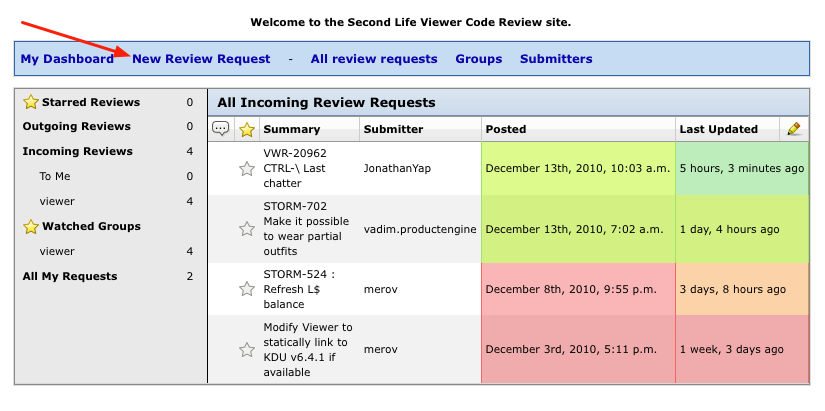
Follow the New Review Request link to begin manually creating a review:

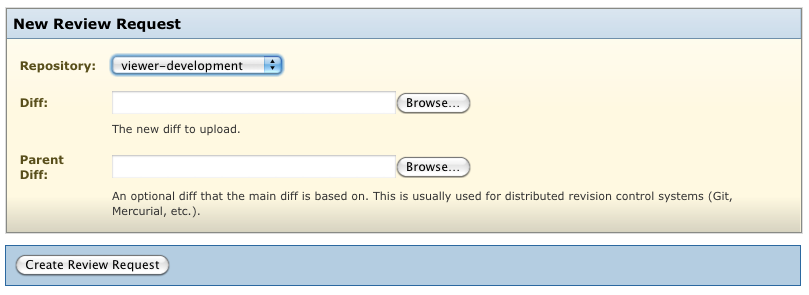
This takes you to the form that lets you upload your patch:

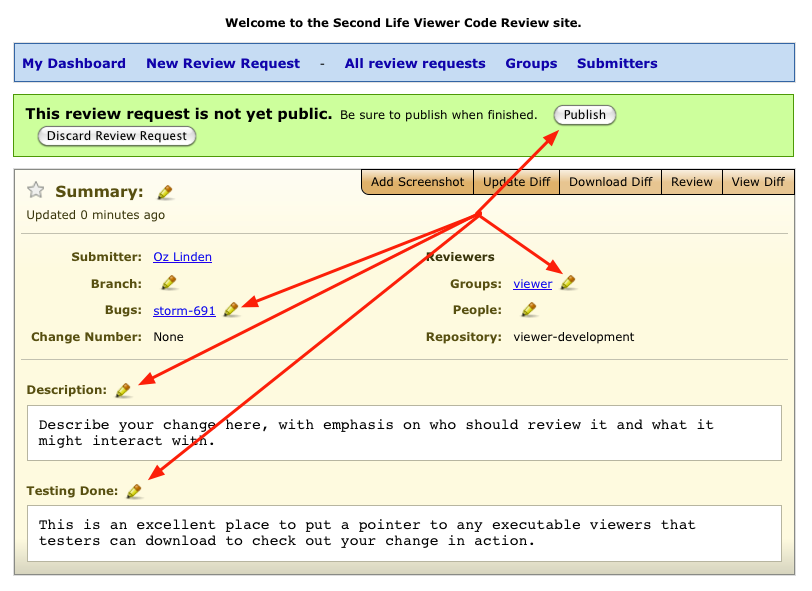
Select the repository from which you forked/cloned your working repository (making the wrong choice here increases the chance that the patch will not apply cleanly), and upload the PATCH file in the Diff field. You usually will not need the Parent Diff upload field, and can leave it empty. Then push the Create Review Request button to upload your patch and create a Draft Review:
Fill out each of the fields:
- Groups
- Enter viewer (it will auto-complete)
- Bugs
- The identifier for the Jira issue this relates to (this becomes a link to the issue, but you just need to provide the key)
- Description
- Describe the fix, not the issue
- Testing Done
- Optional, but very nice if you can provide useful information here.
You must Publish Your Review
post-review
There is a command line tool called post-review, but it is not very mature and whether or not it works can depend on how you created your mercurial repository. I plan to work on improving this asap - Oz
Publish Your Review
Commenting
Whenever possible, comment by selecting lines in the file and entering a comment. It makes it much more specific than if you post a general comment.

