Difference between revisions of "Heterocera Network"
Hyper Mole (talk | contribs) |
Hyper Mole (talk | contribs) |
||
| Line 18: | Line 18: | ||
*[[Heterocera_Route_2|Route 2 (North Heterocera Coast Road)]] | *[[Heterocera_Route_2|Route 2 (North Heterocera Coast Road)]] | ||
*[[Heterocera_Route_3|Route 3 (North Heterocera Inland Link)]] | *[[Heterocera_Route_3|Route 3 (North Heterocera Inland Link)]] | ||
== Route 4 == | == Route 4 == | ||
Revision as of 11:40, 22 September 2011
Return to main : Second Life Road Network Directory
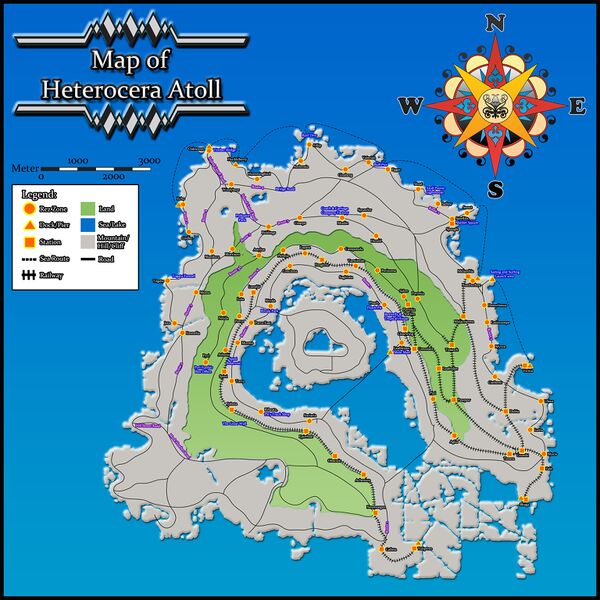
An extensive network of roads exists on Heterocera, and this page deals so far primarily with the new construction within the northern section of the continent.
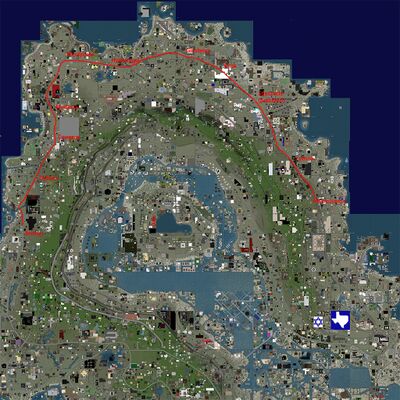
The maps present here are initial construction maps and may differ slightly from what is on the ground until such time as fresh mapping can be obtained.
 click image for larger version
The following descriptions break this network down into a number of distinct routes.
Roads of Heterocera
- Route 1 (East-West Heterocera Link Road)
- Route 2 (North Heterocera Coast Road)
- Route 3 (North Heterocera Inland Link)
Route 4
 click image for larger version
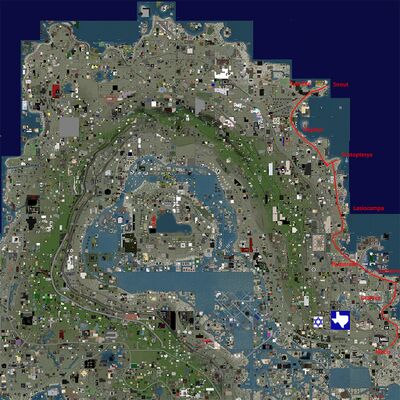
Route 5 : Coastal Byway
 click image for larger version
Route 5 Public Rez Zones
Xanthorhoe Train Station
Denrolimus
Lasiocampa
Myron
Cisthene
Ufeus
Mocis
Route 5 Public Boating Areas
Public Launch area in Xanthorhoe
Sailing and Surfing Launch area, Scotopteryx
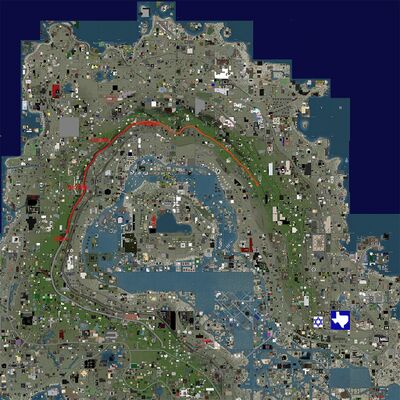
Route 6 : The High Mountain Road
Much civil engineering work has been carried out on this lonely and at times vertiginous road linking the SLRR with the Great Wall of Second Life, along a twisting, climbing route navigating the footslopes of the highest peak on the mainland, Mount Campion.
Hardy travellers not afraid of mud, giddy heights or splinters in the foot, may now travel this way. The eastern hitherto impassable cliff face sections have now been bridged and made free to explore, while the western hillsides nearer to the broken wall still require an all terrain vehicle ideally of the four legged variety .. neigh !
 click image for larger version
Route 6 : The Great Wall
Access from the heights of the wall has been made down to ground level by a trestle ramp of heavy timber construction, strong enough for most vehicles, horses, camels, elephants … whatever one's choice of transportation.
Route 6 : Athetis Rez Zone
At the foot of the ramp, the route presents itself, inviting the intrepid traveller to commence the journey, the grass covered remains of the ancient stone of the wall footings winding away like a ribbon towards distant peaks. A rez zone is here for convenience.
Route 6 : Western Trail End
The vegetation closes in, mud, weeds and the occasional puddle encouraging careful driving, or perhaps checking the speed of your trusty equine steed.
Route 6 : Deltote
The path has become overgrown here over the years, remnants of the old wall being reclaimed and softened by nature's grasp.
Route 6 : Begin the Ascent
Eventually, the path begins to climb towards higher ground, hugging a narrow stoney ledge into the foothills as the views below begin to open out.
Route 6 : Parva Rez Zone
The mountain slopes become less firm, narrow gullies necessitating bridges for easy travel where ground has given way in the past. There is a small rez zone just west of this small crossing.
Route 6 : Lota Rez Zone
Rising upwards, the ledge becomes flatter for a while, at some point here the route has been paved with stone and edged with pillars. A passing place in Lota offers the traveller an opportunity to sit and admire the view from this higher ground, also a rez zone is here
Route 6 : Moth Rez Zone
Eventually the luxury of a paved surface comes to an end, a rough track making it's way past the occasional wall fragments. Here, in Moth, is another small rez zone.
Route 6 : Fucosa Pond
Pockets of verdant green are still encountered even at this point on the mountain, such as around a small roadside pond in Fucosa, a little oasis in which to take a breather.
Route 6 : Plebeja Rez Zone
Eventually, the now log lined road starts to traverse deep gashes in the hillside and make it's way up to higher, steeper ground. A rez zone is located in Plebeja over just such an improvised bridging point.
Route 6 : Lapara Tunnel
Major subsidences, and even avalanches in deep winter are not unknown, and at the location of a cliffside waterfall in Lapara, a lengthy brick constructed avalanche tunnel may be seen.
Route 6 : Campanula Rez Zone
The clouds begin to crowd in, mist rolling down the dark slopes, the road still climbing as you begin to realise you are truly entering mountain country, a rez zone being placed here at the viewpoint.
Route 6 : Mount Campion
As the road steepens, a sign informs you that you are now traversing the footslopes of Mount Campion, the highest point on the SL mainland, and well worth exploration if you have a head for heights.
Route 6 : Taeniatum Trestle
The slopes become narrow here, not even wide enough to support a viable road. accordingly, a long timber trestle spans the plunging slopes, enabling you to continue the journey eastwards.
Route 6 : Perizoma Rez Zone
At Perizoma, a small flattened ledge between viaduct constructions is the site of another rez zone.
Route 6 : Nolidae
Beyond this point, the slopes still tumble steeply down the mountain, and a more modern concrete viaduct has replaced the trestles, perhaps due to a catastrophic collapse or fire in the past.
Route 6 : Sabre Rez Zone
Eventually, the traveller emerges onto flatter high ground at Sabre, with views across the lowlands to the south. A large rez zone marks the eastern extremity of Route 6, and you've made it through the peaks !
Route 6 : Eastern Trail End
At the far end of the rez zone are signs indicating the limit of the public road, and looking beyond .. here be trains !
Route 6 : Beyond the Road
A small path winds through the undergrowth revealing some abandoned mining heritage, an old traction engine sitting next to a rusted crank and flywheel.
Route 6 : Echoes of Industry
An old 19th century pumping house sits here at the railhead, evidence of past industries.
Route 6 : SLRR Rail Head - Pavonia
A small platform remains at this spur of the SLRR mountain branch, occasionally visited by tourist traffic, you may just be able to catch an eastbound train here.
External Links:
Heterocera Atoll Map http://heterocera.protected-routes.com/
Return to main : Second Life Road Network Directory


