Difference between revisions of "Mesh/Uploading a simple mesh"
< Mesh
Jump to navigation
Jump to search
Vir Linden (talk | contribs) m |
|||
| Line 1: | Line 1: | ||
First we'll need to download a COLLADA model file to your computer: | First we'll need to download a COLLADA model file to your computer: | ||
* Download duck.dae from https://collada.org/owl/download.php?sess=0&parent=126&expand=1&order=name&curview=0&binary=1&id=698 | * Download duck.dae from https://collada.org/owl/download.php?sess=0&parent=126&expand=1&order=name&curview=0&binary=1&id=698 | ||
Revision as of 07:37, 28 September 2010
First we'll need to download a COLLADA model file to your computer:
- Download duck.dae from https://collada.org/owl/download.php?sess=0&parent=126&expand=1&order=name&curview=0&binary=1&id=698
Next we will upload the model to Second Life:
- Open the Build menu, choose Upload, click 'Model...'
- Alternately, open the Inventory, click the + menu button and Upload > "Model"
- A file dialog box will open
- Pick the duck.dae file from your computer.
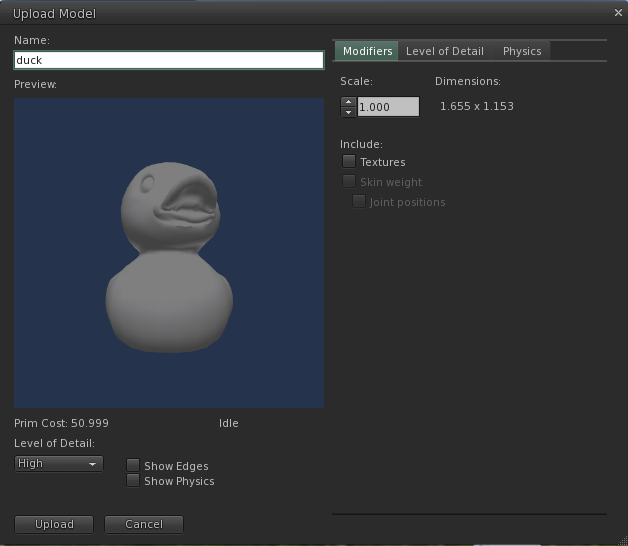
- The Import Model window will appear.
- Click the 'Generate LOD' button at the top of this window.
- The viewer will take a moment to process this, then the Upload button will become clickable.
- Click the 'Upload' button.
- You will see 2 assets inserted into your Inventory. One will appear in the Meshes folder and one will appear in the Objects folder. We only care about the Object right now.
- Drag the new object from your Objects folder onto the ground.
- A duck model will appear on the ground. You can use the duck mesh as you would any other object. Scale it, texture it, attach it, script it, whatever you like.
