Saving textures
How to save textures to disk
You can export any fully-permissive texture from Second Life and save it to your hard drive (or other storage medium).
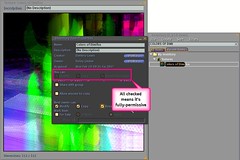
By fully-permissive, this means you must have ALL "Modify", "Copy", and "Resell/Give away" (transfer) rights for the texture. You can check this by right-clicking a texture in your inventory and selecting Properties.
Example of a fully-permissive texture:
<a href="http://www.flickr.com/photos/torley/398090029/"><img width="240" height="160" src="http://farm1.static.flickr.com/188/398090029_3032e77772_m.jpg" /></a>
By default, textures you upload yourself, whether it's via File menu > Upload Image or the Snapshot button > "Upload a snapshot", will be fully-permissive for you.
So here's how to do it:
<a href="http://www.flickr.com/photos/torley/398073508/"><img width="220" height="240" src="http://farm1.static.flickr.com/186/398073508_ca5d78096d_m.jpg" /></a>
- Double-click the texture in inventory to view it.
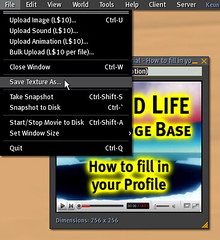
- Go to File menu > Save Texture As.
- Give it a name (it doesn't auto-copy the name of the texture), and save it to a directory.
If you go to that directory on your computer, you should see a "texture.tga" file. TGA stands for the Targa file format, which can also be used to upload textures into Second Life. Most graphics editors are capable of viewing TGA, and there are some free ones, like XnView, which can convert into other formats too.
In any case, once the texture's on your local disk, you're free to edit it, and then re-upload it back into Second Life if you want. You can upload them to a photo-sharing website like Flickr, which has both a Resident-run and a Linden-run Linden Village group.
Why are there two icons for textures?
Good question! For all practical purposes, they function the same, but the icon denotes how the texture got into Second Life. If you use File menu > Upload Image, the resulting texture has this icon and ends up in the Textures folder:
<a href="http://www.flickr.com/photos/torley/398075828/"><img width="64" height="64" src="http://farm1.static.flickr.com/165/398075828_34bbf441ce_m.jpg" /></a>
And if you take an inworld snapshot (Snapshot button > "Upload a snapshot, then click Upload), the resulting texture has this icon and ends up in the Photo Album folder:
<a href="http://www.flickr.com/photos/torley/398075817/"><img width="64" height="64" src="http://farm1.static.flickr.com/167/398075817_543243affb_m.jpg" /></a>
One other difference is, if someone else sends you a snapshot with the latter icon, it'll end up in the Textures folder.
We know this — different icons for essentially what's the same item type — is confusing to some, and perhaps in the future, this can be improved.
How do I batch save textures to my hard drive?
A common example of this is when someone's accumulated many months (or even years) of Second Life memories, and wants to save all their photos to their hard drive.
Unfortunately, there's no way to do this at present — textures must be saved one at a time, and named accordingly. It'd be useful, though!