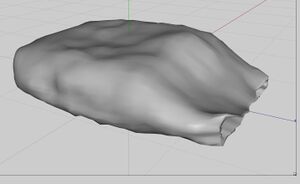
Sculpted Prims with Wings 3D
Wings 3D is an open source 3D modeler with an active user community. It can be used to create models and a plug-in is available to export the model as a sculpt map compatible with Second Life.
When making a sculpty, you should not use many of the built in features of Wings. In particular, you should not add or delete vertexes, edges, or faces as you create your model. Wings is primarily a sub-division modeler. This means that normal use of Wings involves adding more and more polygons where you need them to modify the overall shape. You will see this in the various Wings 3D tutorials on the web. However, Second Life sculpties require a very specific set of polygons (as described below). Don't add or delete as you go along.
Getting Started
- Obtain Wings 3D version 98.36 from [ http://www.wings3d.com/].
- Obtain the Second Life plug-ins from the SL forums. [1]
- Optionally, obtain the UV maps from the forums [2] - you need a program like UVMapper to apply the UV file to your object.
- Optionally, read through the existing forum discussion. [3]
Sculpty creation in Wings
- Create a sphere (no other shape supported at present). It should be 8x7, 16x15, 32x31, or 64x63. The low resolutions are good for experimenting, but the higher resolution will probably be used for final products. This sphere will contain the exact final set of polygons you must maintain. If you add or delete, your object will appear freaked out in Second Life.
- Shape your object from the sphere. Think of the sphere as a lump of clay, and push and pull it into shape without tearing it (very much). The basic techniques are selection and tweaking.
- Selection: there are numerous tools in Wings for selecting sets of vertices, edges, and faces. Then the entire selection can be moved, stretched, and rotated, plus several other transformations.
- It is useful to grow or shrink the selection (+ or -), then transform, then grow a little more, then transform,, and so on.
- Once you have selected part of your object, you can Move, Scale, or Rotate that part. There are a few other operations. Remember, you cannot use operations that change the number of vertices.
- Tweaking: In tweak mode, you can grab one vertex, edge, or face and move it around. This is best combined with magnetism, which causes nearby polygons to also move, but not as much. The strength of the magnetic field can be adjusted.
- Tweaking is like pushing and pulling on the sphere as if it were a lump of clay.
- Another useful trick is tighten. Select a large number of edges, and tighten them. Wings will readjust them so that they are all more equal in length, without distorting the model.
- Save the 3D model. This will be called a .wings file.
- Using the Second Life plug-in, export the sculpt map. A .bmp file will be created.
- Upload the .bmp file, and apply it to a scultped prim.
- Optionally, paint the sculpty.
- Upload the paint job, and apply it to the sculpty.
(See this thread about UV mapping in Wings for more details.
Some relevant features of Wings
- In Second Life, alt-mouse is used to zoom around and rotate the camera view. In Wings, there are several different ways to accomplish the same thing. Preferences can be used to make Wings emulate several other 3D modeling packages. Maybe someone will make Wings emulate the Second Life viewer, or better yet, will add similar options to the viewer so that it can be made to emulate Wings, Maya, or Blender.
- The x, y, z coordinates in Wings are not aligned with Second Life coordinates.
- The default sphere in Wings will make a small object in Second Life.
For other info regarding this and other 3d software, check out Sculpted Prims: 3d Software Guide.
