Tips for Creating Heightfields and Details on Terrain RAW Files
Private Region owners can set their own ground textures and upload raw height maps in a special 13-channel RAW graphic file format (see below).
Land in Second Life is stored as a 2D grid of height values. This means the ground can never overlap, nor can there be made holes through the ground. The grid has a resolution of 1m in each direction, resulting in 256x256 grid points (0 to 255) per region. It can be modified with the built-in terraforming tools or the LSL function llModifyLand. It can also be read using llGround. Land height between the grid points is interpolated, giving it a smooth look. The surface is textured, using multiple textures based on the land height and slope.
Land is owned by agents or groups. Such land parcels consist of blocks with at a resolution of 4x4m size. Land owners can disallow the rezzing of objects or running scripts. Sound can optionally be restricted to a parcel, with no sound leaving or entering it. Land parcels can have an audio stream associated with them.
Creating Height Field Maps for Second Life
These steps presume you'll be designing a land mass comprising more than one Region, but also apply to single-Region design. When designing land that will abut existing land, obtain the heightmaps (if possible) from neighboring Regions and paste them into the grid of your working file.
- Set up a 256-pixel grid on your master document to use as a guide (Second Life can only accept Regions that are 256 pixels squared).
- Paint your land as you wish, keeping in mind the caveats mentioned in the previous section. As you paint, try to minimize the amount of noise, as this will cause the terrain to be bumpy and difficult to walk on. Try a blurring function on your heightmap.
- Remember that the water level has a default elevation of 20 meters (with a corresponding gray value of 20), and that an estate owner can change this setting in-world.

|

|
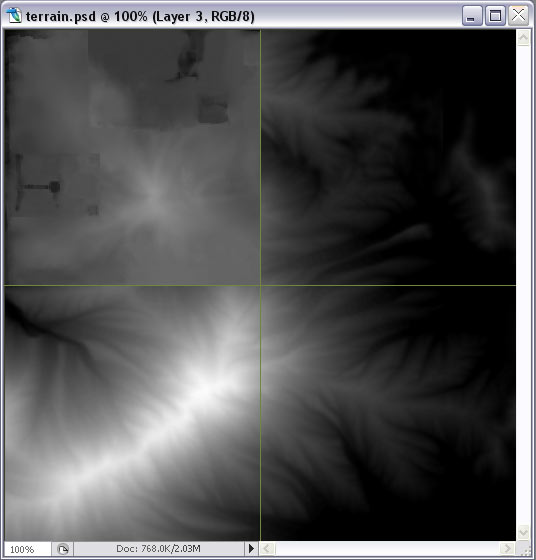
| Gray-scale heightmap (or elevation map). | The same heightmap revealing the water layer (at the default value of 20) and grid to show simulator borders. |
- Make sure the elevation data is clean and in exists in each of the RGB channels as well as the Alpha channel.
- Flatten all layers.
- Make sure the file is 16-bit.
- From the Save As dropdown, select .raw. Be certain to include the X & Y dimensions of the file in its name (example: HF1_1024x512.raw).
- Make sure the Alpha Channels checkbox is selected.
- Choose Non-interleaved Order and IBM PC.
- Click OK.
Smoothing Out Borders with Existing Simulators
If you're creating terrain that takes the place of some existing terrain:
- Paste the existing heightmap into a layer on top of your new artwork (in this example, the upper left-hand corner).
- Along the edges where the existing simulator touches your new one, copy the pixel values from the existing heightmap onto your new one. Shared pixel values across simulator borders are the best way to ensure seamless borders when matching existing terrain.
- Use the smudge and erase tools to blend the layers together.
- Save the file in RAW format.


Importing a Height Field Map
To import your heightmap into Second Life, your avatar must actually be in the region you wish to terraform.
- Make sure you've saved any content that exists on the region to your inventory!
- From the menus at the top of the Second Life window, select World > Region/Estate.
- Click the Terrain tab, and click Upload RAW terrain.
- Navigate to the location of the RAW file you wish to upload and click Open. It may take a minute or more to upload the file to the region. You'll receive a note stating that the file has been successfully uploaded.
- When you're satisfied with the terrain, return to the Region/Estate window and click the Bake terrain button.
Notes for Creating Height Field Maps for Second Life
As of Second Life v. 1.3, terrain height fields are created and uploaded into a new region via a 13-channel .raw graphics file. Each channel in the file contains specific information represented by a gray color value between 0 (black) and 255 (white). The size in pixels of one region's .raw file is 256x256. A region is 256x256 meters, so the resolution of the .raw file is 1 square meter per pixel.
You can view a .raw file in Photoshop. When opening the file you are prompted for, you must specify the height and width of the file size in pixels, as well as the number of channels (13). Since bulk uploaded .raw files can be an arbitrary size (dimensions must be divisible by 256), and since the file will not load correctly unless these values are correct, it's important to keep track of the dimensions of the file. It's helpful to embed the dimension in the name of the file itself; for example, "snowregion_hf_2560x1024_v2.raw". This information is required during bulk sim upload. There should be no spaces in the raw filename, since the raw file uploader utility can't handle spaces.
Download a sample RAW file (of the Brilliant region) - Unzip it and open it as 256x256 with 13 channels
| Note: Historically, all 13 channels of the RAW files were used in the terraforming process. This number has since been reduced to 3 terraforming channels. Despite this, it is still necessary to create and save the RAW file with 13 channels! |
Here's how the 3 useful channels in the raw file are defined:
| Channel Number | Gray Value Range | Description |
| 1(red) | 0-255 | Height Field |
| 2(green) | 0-255 | Height Multiply Factor |
| 3(blue) | 0-255 | Water Height of sim in Meters |
Notes on Channels
- Channel 1(red) is the raw terrain heightfield data. In its simplest form it represents the ground height in meters of every point on the map, where black (grey level 0) is 0 meters high and white (grey level 255) is 255 meters high. However, the height of the terrain is often modified further by values in channel 2.
- Channel 2 (green) is a grayscale map that is used as a multiplier to scale the data in channel 1, resulting in the final height of each point on the map. The formula used to combine the 2 channels is: original height (channel 1) * multiplier (channel 2) / 128. A few examples will help to illustrate their interaction.
- 32 -- Divides pixel values by 4. The resultant elevations will be 32 / 128 = 1/4 of the original
- 64 -- Divides pixel values by 2. The resultant elevations will be 64 / 128 = 1/2 of the original
- 128 -- No effect : 128 /128 = 1 times the original.
- 255 -- Multiplies pixel values by 2. The resultant elevations will be twice that of the original : 255 /128 is about 2.
- Channel 3 (blue) is a gray value that sets the water height of the sim in meters. A sim can only have one water height, so fill the entire channel with one value. The default water level found in Second Life is 20 meters. This is the level of all "void" water, as well as the water level on the vast majority of existing sims. The water level can be set to other values on a per sim basis, but this should only be done in special cases, since it leaves a noticeable vertical gap between sims whose visible water edges abut but are not at the same level. The water channel is not affected by the multiply channel, so the maximum height of water is 255.
Misc. Tips for Creating Terrain
- While tempting, creating a 512 meter high mountain on a 256 square meter sim usually leads to disappointing results. Ground textures will be stretched and tiled unrealistically. Draw distance setting on most people's machines means that if they stood on top of the mountain, they couldn't see the ground below. Artifacts in the skybox and frame rate slowdown due to lots of overlapping clouds viewed close up will be apparent. Steep cliffs often tessellate poorly, resulting in jaggy terrain, and entire mountains may disappear when viewed from a distance due to the lower level of detail. Many of these artifacts can be reduced or avoided by keeping the range of the elevation in a sim to within 50-100 meters. Similarly, any radical changes in height over a short distance will exhibit some of these artifacts, so design accordingly. This was reported fixed, so this might no longer be valid.
- Many commercial and shareware tools exist for creating terrain files. Existing real world terrain data is also available from various sources that can be useful starting points for creating your own heigh tfields.
- Blurring the terrain channel slightly often improves the visual quality of the ground inworld.