User:Hypatia Callisto/Carrara Sculpt Baking
Requirements
Carrara 5 Pro (Carrara 5 Basic and Carrara 4 versions are untested - might work, don't know) from:
Daz3d.com - [1]
with the following third party plugins:
- Shoestring Shaders [2]
- Baker plugin by [Inagoni http://www.inagoni.com/content.php?content.3]
many many thanks to Steven McQ on the Yahoo Carrara list for his help.
The Model
The model is very important to sculpt creation. As of currently, this model must be a spherical topology with a perfect spherical mapping. However, there are some problems with polygonal texture baking to uvmaps using a sphere, as the poles create gaps in the map.
There are two ways to get around this problem -
fill in the gaps with the free Photoshop plugin from Flaming Pear - Solidify A. This method works sometimes very well, sometimes very spotty. Baker doesn't help this issue, as it often is inexact when baking to these tiny areas.
or -
delete the single poles from the model and resize the points across the poles to a single point. It is important to start with a sphere and do the spherical uvmapping first, then resizing the map exactly to fit the entire uvspace *before* you start deforming it, or you won't have an exact uvmap.
I've chosen to go with the second option. The sphere model and the shader file are both provided in the Carrara scene file I've made available for download in the forums [3], so the annoying work is already done. :D This model is free to use for your own creations, no strings attached. The SLSculptie shader requires Shoestring Shaders in order to run.
The Shader
The shader uses three important parts -
Super Mixer available in the Shoestring Shaders package. This allows you to mix three color channels together - which you can't do in Carrara without this plugin. (Carrara is limited to mixing two channels)
Color Gradient and Elevation - these two shaders are part of Carrara 5.
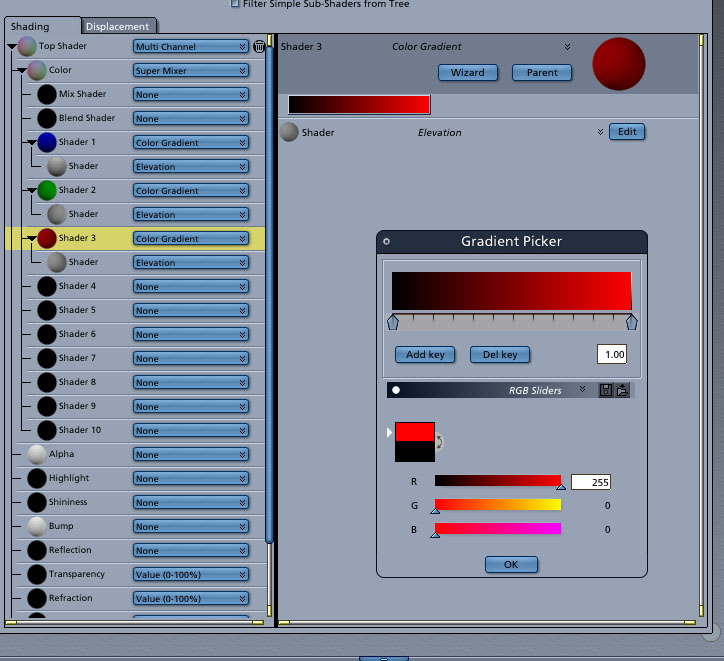
Color Gradients are straight forward, in the screenshot examples. They move from black to full saturation, in red, blue and green, similarly to a normal map, except in this case we're encoding surface positions.
This is where the Elevation shader comes into play.
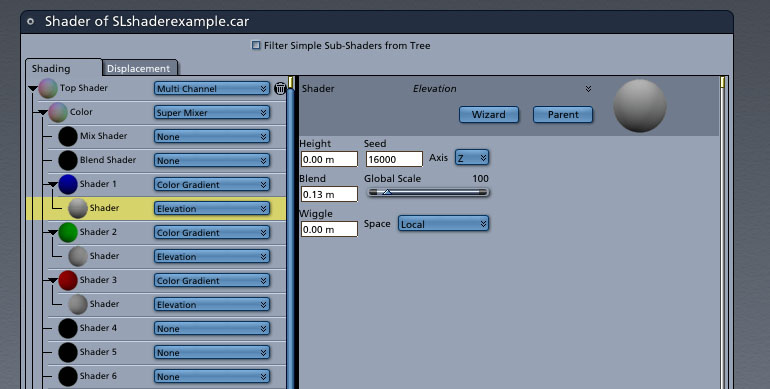
Normally a shader used for terrain texturing, in this shader it determines how intense the color across an axis is, depending on how far away that point on the surface is from the origin. Red moves across the X local axis, green across the Y local axis, and blue across the Z local axis - from 0 to 255
The origin in the elevation shader is represented by the "Height" dialog box. This must be at 0.0 or else the center of your sculptie will be offset in SL.
The edges of the bounding box is represented by the "Blend" dialog box. This must be the radius of your object size, which you can set in the vertex modeller.
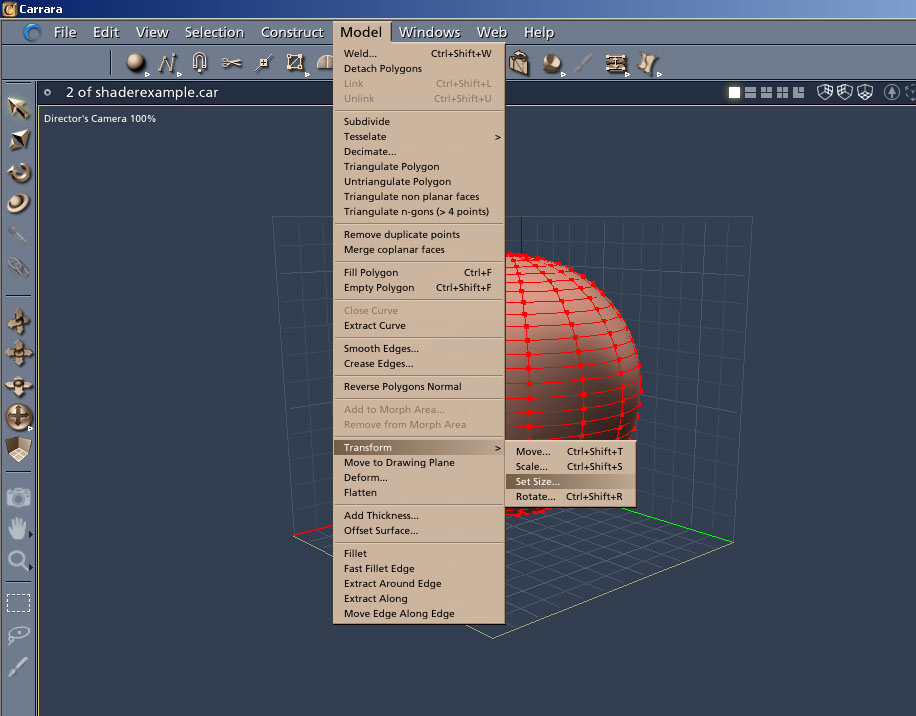
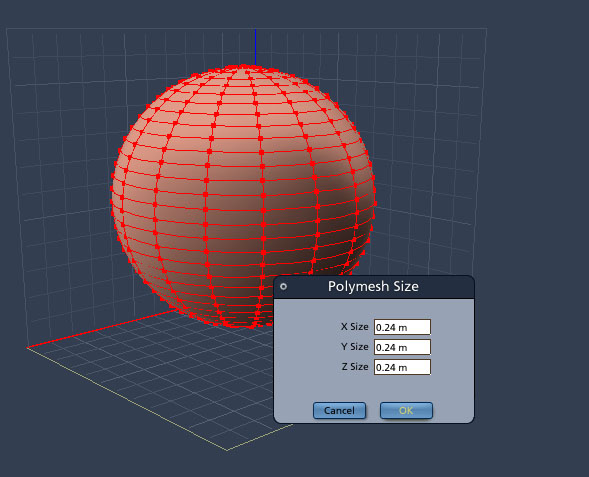
So, in the vertex modeller - check your model size -
Radius can be figured out by halving the diameter of your model at its longest side. I usually make the radius a little larger in the shader for wiggle room.
This also represents a great cool hack for sculpties :D The larger your blend as opposed to your model, the smaller your sculptie becomes in Second Life. Yes, you guessed it. Tiny sculpted prims! Ultra useful for jewelry. Just be aware that the closer to grey a texture gets, the greater the risk for a bad looking sculptie in SL.
The scene lighting
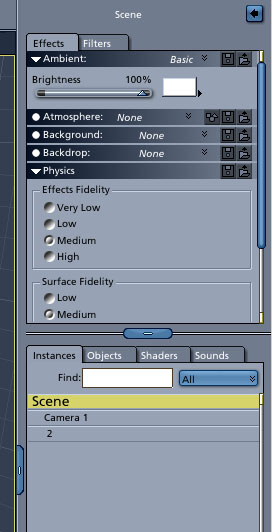
The scene before baking must be utterly dark. Delete and/or switch off all lights in your scene. Select "Scene" in the Instances tab. Then crank up the ambient brightness to 100 percent, and make sure the color chip is white. (as shown in this screenshot)
Baking
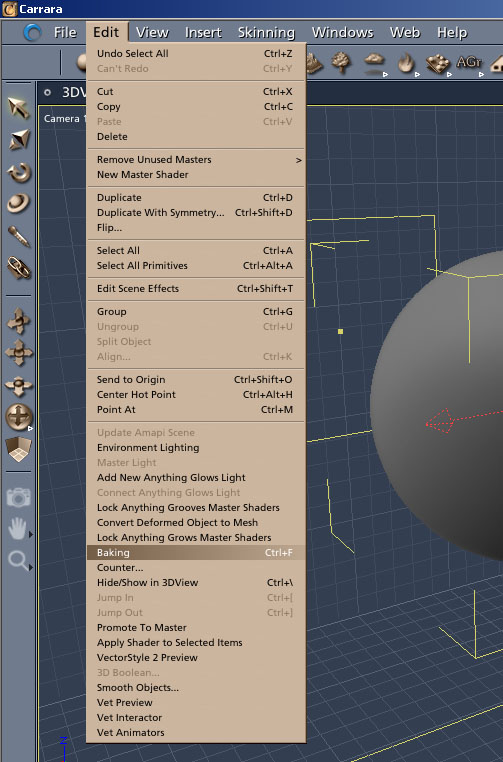
Carrara 5 does not support texture baking without a plug in. You need Inagoni's Baker to complete the final step.
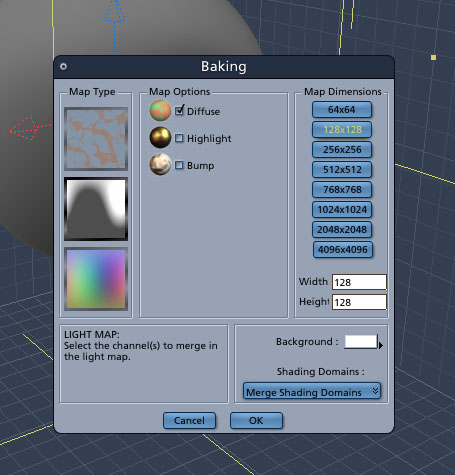
Select the second option under map type - Light Map. Be sure only Diffuse is checked under map options. Then check 128x128 as the map dimensions. Leave the rest as defaults as shown in the screeshot. Click "Ok" and you've baked the sculpt map!
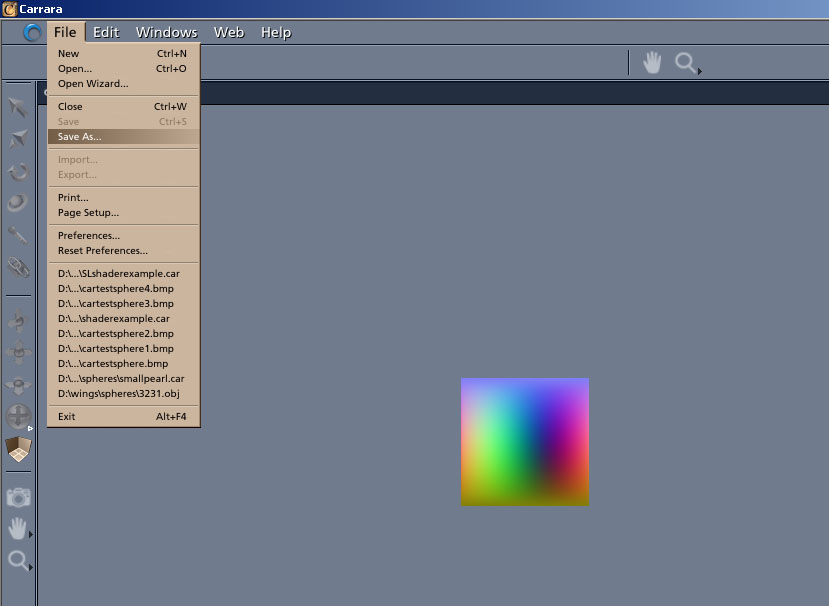
You can then save the file, and are able to choose several formats for saving. Recommended are bmp or tga, as they are lossless and SL handles them well. Stay away from JPG or you'll end up compressing your texture, which will affect the quality of your sculpt in Second Life.
