Environmental Enhancement Project
How To EEP
Welcome to the Environmental Enhancement Project (aka EEP!) EEP is a major enhancement to the legacy Windlight environments, introducing new inventory object for defining the environmental settings.
- Shareable environmental objects that you can keep in your inventory.
- Parcel level control of environments.
- Up to four different sky layers that may be set independently.
- More options for customization.
- And much, much more
For specifics on how to use the environment settings available in the EEP viewer, check out our Environment Editor Knowledge Base article!
EEP Settings Objects
EEP provides 3 new inventory assets called settings. Settings may be created and destroyed through your inventory, they may be given to other people or sold through the marketplace.
Types of Settings
Skies 
Sky settings define the look of the sky. They control the color and direction of the ambient light, the images used to display the sun and the moon and their positions in the sky.
Water 
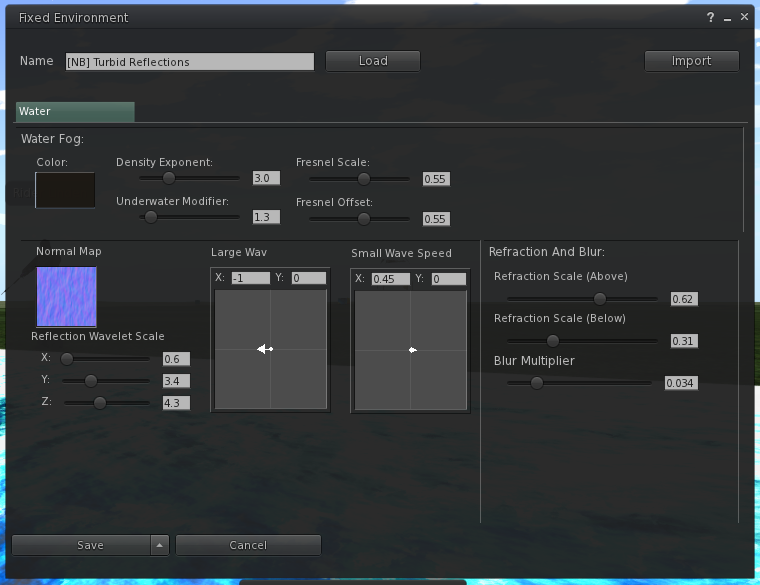
Water settings define the look of linden water. Its color, how reflective the surface is and the shape and direction of the waves.
Day Cycles 
Day cycles are collections of skies and waters that blend together to for an entire day.
Settings Permissions
There are a few notes on permissions with settings object.
copy/no-copy
Settings object may never be marked no-copy. A person who owns a setting object may always make a copy of it in their inventory.
transfer/no-transfer
The no-transfer permission is persistent. If you import any no-transfer day or water object into a day cycle, that day cycle will also become no-transfer. Once saved, this change can not be undone.
mod/no-mod
Modify and no-modify permissions behaves as normal.
EEPing
Creating Your First Settings Object
Settings items live in your inventory, by default you will be able to find them in the new system folder called ![]() "Settings". Under normal circumstances the settings folder will only be visible if it is not empty.
"Settings". Under normal circumstances the settings folder will only be visible if it is not empty.
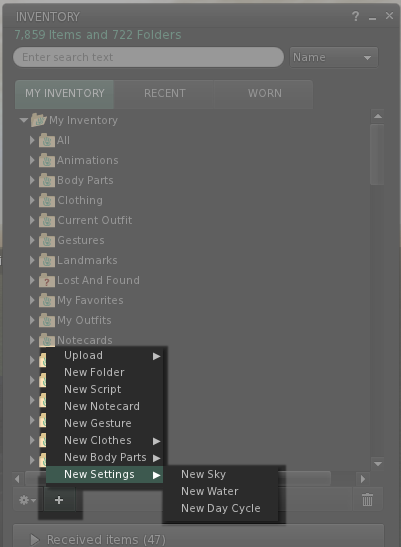
You can create new ones either by clicking the "Add New Item" button on the bottom of the inventory floater and selecting "New Settings" and then the type of setting you want to create. The new setting will be created in the Settings system folder.
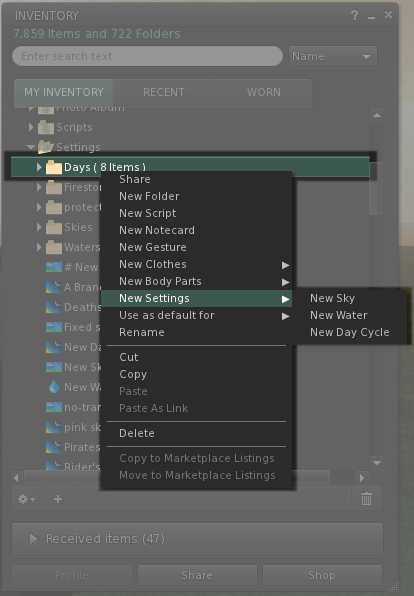
Alternately, you may right click on a folder in your inventory. From the context menu select "New Settings”. This will create the settings object in the selected folder.
Editing Settings Objects
To edit a settings object in your inventory either double click it or right click and select the "Open" command from the context menu. The Second Life will bring up the appropriate edit floater for the type of setting you selected.
See the section on editing settings for more information.
Applying Settings From Inventory
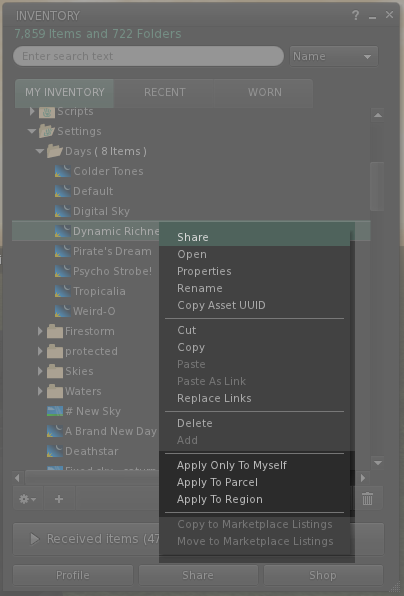
You may apply settings directly from inventory to either the region you are in, the parcel you are standing on or only to yourself. You will always have permission to change your own settings, applying to a region or to a parcel will depend on your land permissions.
To access this functionality right click on the desired settings object and select the command from the context menu. The change will occur immediately.
Menu Miscellany
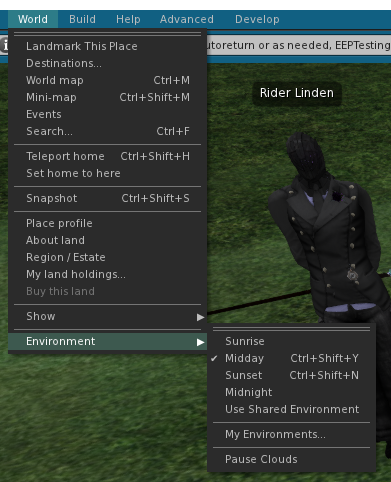
EEP Also provide the World > Environment menu with a number of extra functions.
Sunrise, Midday, Sunset and Midnight
These four options will set your local environment to one of the four well known skies. The effect of setting one of these is only visible to yourself. These menu items do not change the settings in the region or affect what other Residents see.
This option instructs your viewer to display whatever environment is configured for the parcel or region that you are in. This will be the environment that is also seen by other Residents in the same area.
My Environments…
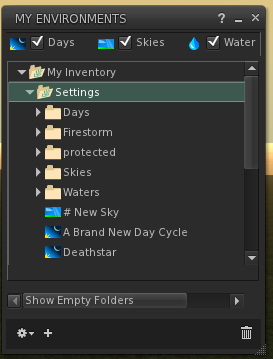
“My Environments” opens a specialized inventory floater that displays only settings files, both those in your inventory and any that are in the library. You may further filter your settings by type (skies, water or full day cycles.) Most functionality available in the normal inventory floater is also available here.
Pause Clouds
“Pause Clouds” will stop animation on the clouds and waves, freezing them in place until the option is unchecked. This can be handy when taking pictures or screenshots.
Applying Environments And Settings
The Environments Tab
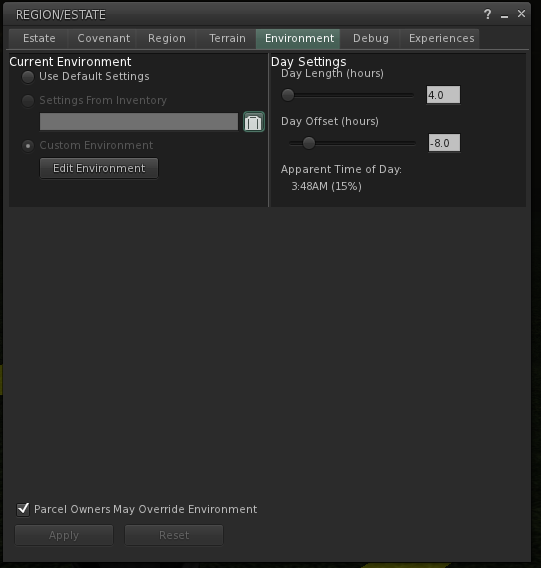
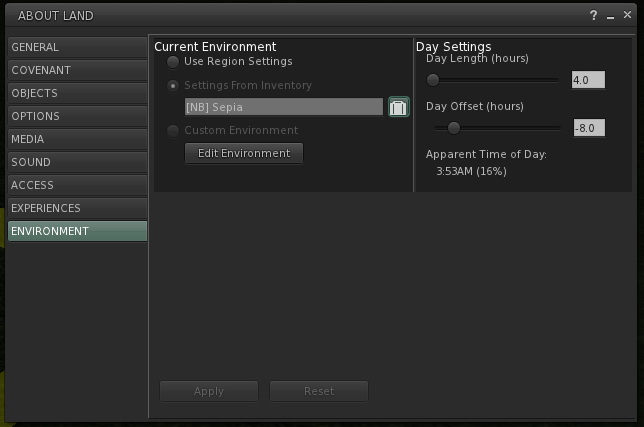
The Environments tab is available from both the Region/Estate and the About Land floaters. Region/Estate is used to control the environment across the entire region and may only be changed by estate managers. The About Land panel allows parcel owners to make changes to their parcel if that is allowed by the region owner.
Current Environment
Current Environment
The current environment area displays information about the day cycle applied to the region or parcel. The pip on the left indicates what state the region or parcel is currently in.
Use Default Settings/Use Region Settings
On a region, when this pip is highlighted, the current day cycle in use is is the Default Day Cycle (Midnight through noon and then back to midnight, the sun moving from east to west)
If this pip is highlighted for a parcel it means that the parcel has no environment of its own set and will use whatever the region is set to.
If a region or a parcel is using a custom day cycle, or a day cycle directly from inventory, it can be reset to the default by clicking this pip.
Settings From Inventory
When the pip is next to this line, the region or parcel is using an unmodified day cycle set directly from your inventory. The name of the day cycle is displayed just below this entry.
Clicking the inventory button will open a picker allowing you to select a setting to apply.
Custom Environment
Day Length and Day Offset
Day Cycle progression on regions and parcels is calculated based on GMT.
The Day Length, as the name suggests controls how long the day on the region or parcel is. This can be any range between 4 and 168 real world hours. There are 168 hours in 7 days so you could have a day cycle applied that would take a full week to complete.
The Day Offset can be thought of like a time zone. It is the number of hours offset from GTM the beginning of the day cycle is.
For example a day length of 24 hours, with an offset of -8 hours (-7 in the summer) would synchronize with SLT.
Apparent Time of Day
The Apparent Time of Day is an informational field. It examines the day length and day offset and the current time in SLT and translates that into a percentage representing what the current position within the day cycle would be.
Parcel Owners May Override
This option is only available to an estate manager on regions. When checked, parcel owners may set custom environments on their individual parcels. When unchecked they may not. This is an estate wide setting.
Caution when unchecking this option: any existing customisations done at the parcel level will be removed.
Apply and Reset
These buttons are unavailable until modifications have been made to the environment settings. Apply will take any changes that have been made and post them to the region or parcel. Reset will throw away any changes that have been made, reverting everything to what is currently set on the server.
Editing Your EEPs
Common Commands
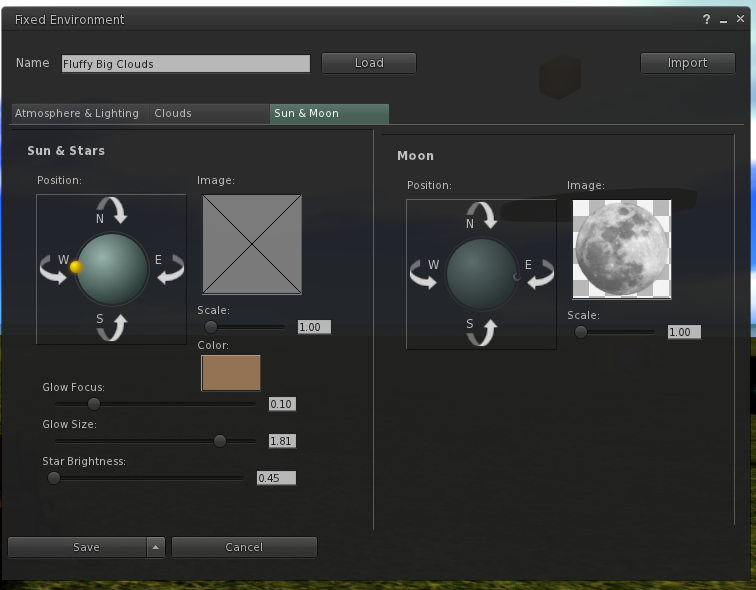
Name
The name field lets you change the name of your environment settings. When saved the name of the inventory item will be updated to match.
Load
The Load button opens an inventory picker and allows loading a different environment settings item into the editor. This will replace any settings that you were previously working on.
Importing existing Windlight settings
If you've already customized your region, or you have saved personal Windlight settings that you like to use, you can import them to the viewer directly via the Import button. Once you've imported a Windlight file, it turns into a settings object that you can edit in the editor window
- Open World > Environment > My Environments...
- At the bottom of the window, click ➕ (+) to Make new setting
- Select New Sky, New Water, or New Day Cycle
- A new object is created in your inventory's Settings folder, called New Sky, New Water, or New Day Cycle
- Double-click or right-click and choose Open to open this new item for editing
- In the editor window that appears, enter a name for your setting in the Name box
- Click the Import button on the upper right of the editor window
- Navigate to your chosen existing Windlight .xml file and select it in your computer's file selection window
- Your custom settings will be imported. Click Save to save your settings as a new object.
Clicking the Import button will open your computer's file selection window, just like uploading a texture or snapshot. To locate your existing Windlight files, you may need to do a bit of searching, depending on which operating system and viewer you use.
Importing Windlight settings on a Mac
Your existing Windlight settings are saved on your Mac in a Library folder which is generally not visible by default. You can open this folder by using Finder. For convenience, it's often easiest to drag your Windlight folder onto your Favorites list temporarily. This will make it easy to find from the file selection menu later.
- In Finder, from the menu bar, select Go > Go to Folder…
- Paste the following link into the entry box: ~/Library/Application Support/SecondLife/user_settings/windlight/
- Click Go
If you like, drag your Skies, Water, or Day Cycle folders onto the Favorites bar to the left to find them again easily when you use the Import button inside Second Life.
Your skies, water, and day cycle settings will be located inside the folders of the same name.
Importing Windlight settings on a Windows computer
Your Windlight folder location may vary depending on which version of Windows you have, and whether or not you’ve installed the Second Life Viewer in a different location than your primary hard drive.
In File Explorer, navigate to the following folder:
- C:\Program Files\SecondLifeViewer\app_settings\windlight
Some earlier versions of Windows, like Windows 7, may have the settings located here:
- C:\Users\USERNAME\AppData\Roaming\SecondLife\user_settings\windlight
💡 Tip: Having trouble? It’s sometimes easier to search for a folder than to locate the folder directly. Searching for Windlight in your operating system’s search menu should direct you to the right folder if you can’t locate it. This will also help you find Windlight settings from any third party or alternate viewers you may have installed, too.
It should be noted that Windlight XML files can be very sensitive to their location in the file system. Please be sure that your Windlight directories are laid out as follows:
- windlight
- days
- <all your daycycles files>
- skies
- <all your sky files>
- water
- <all your water files>
- days
Save/Save As
Save and Save As update environment settings in your inventory. Save will update an existing inventory item if one exists. Save As will always create a new inventory item with the current name.
Apply…
When editing from inventory three “Apply …” options are available in the flyout. These allow you to immediately apply a group of inventory settings to yourself, the parcel or the region.
Commit
When editing a day cycle from the environments tab of the parcel or region floater, the Apply options are replaced with Commit. Commit stores any changes you have made, these changes are not applied to the region or parcel until you click the apply button in the environment tab.
Cancel
The cancel button discards any changes that have been made to the settings object and closes the editing floater.
Fixed Skies and Water
Water Editor
Sky Editor
Day Cycle
Track Tabs
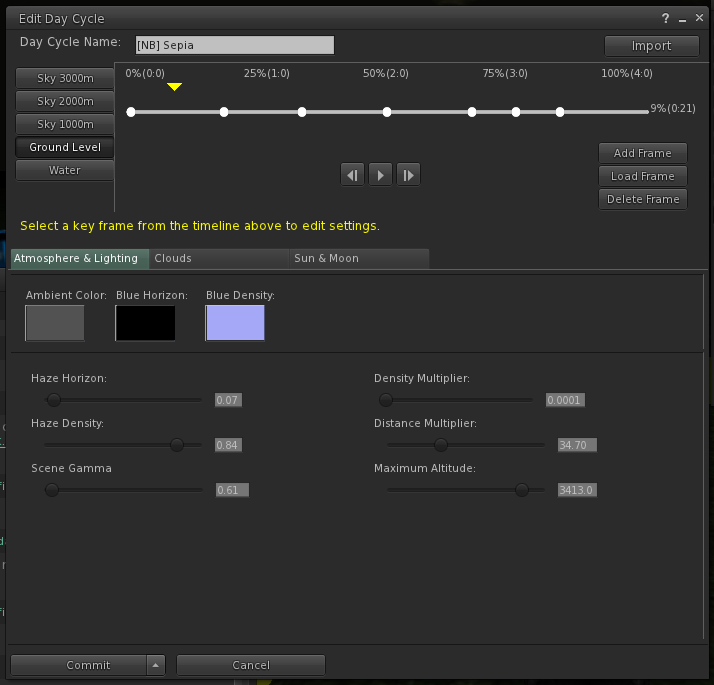
The tracks and their altitudes are displayed along the left side of the editing dialog. There is one track for water and 4 for sky settings. You can use these tabs to select which track you are editing. The timeline, to the right, will change to show the frames that have already been added to the track.
Timeline and Playback
The timeline shows the track that you are editing. Spaced along it are the individual keyframes. Each keyframe is a sky or water setting. The settings established by a keyframe are in effect at the time indicated by the position on the track, and will transition gradually between adjacent keyframes in the times between keyframes. You can preview these transitions by dragging the yellow thumb or by pressing the Play button to quickly play back the entire day cycle speeded up to a 60 second "day".
You may change the current position in the timeline by dragging the yellow thumb. Selecting a frame, or positioning the thumb directly over it, will allow you to edit the setting in that frame. You may reposition a frame by dragging it to a new location on the timeline. Shift-drag will create a copy of the frame and allow you to drag the copy to a new location on the timeline. Pushing the Back button <| will take you to the previous frame. Pushing the |> will take you to next frame.
Add, Load and Delete Frames
The Add frame button will add a new frame at the current thumb position. You can also add frames by double clicking on the timeline.
Load Frame will open a settings picker. Selecting a sky or water setting from your inventory will use those settings to either create a new frame or replace the current frame. If you load a settings object that is marked no-transfer your day cycle will also become no-transfer.
The Delete Frame button will remove the current frame from the timeline.
