Mesh/Setup
< Mesh
Jump to navigation
Jump to search
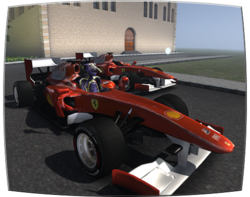
 Race car content by Timmi Allen, model hosted in Mesh City.
Welcome
Welcome to Mesh Beta! If you haven't already, please see our information blog post on 10/13/2010: Mesh Import Open Beta Starts Today. This contains basic information about the goals and status of Mesh. Also, see our main Mesh page for updates and informational links.
The following walkthrough process will introduce you to obtaining Mesh, getting on a Mesh region, and uploading various types of Meshes.
Installation
- Download the "MESH (ADITI)" beta viewer from Second Life's [| Alternate Viewers page].
- Specifically, look for the "MESH" download under the "Second Life Project Viewers" section.
- Be sure not to install this over your existing Viewer 2 installation, or you will likely get a "application failed to initialize properly" error upon startup.
- Import your SL account to Aditi (see Updating Your Account on Aditi for instructions).
- Install and run the viewer.
- Logging in should take you to the "Aditi" grid.
- If for some reason this is not working automatically, type CTRL+SHIFT+G on the login screen to bring up the grid selector pulldown and type or select "Aditi".
- Go to region Mesh City or any of the other Mesh-Enabled Regions.
- Note that "Mesh City" and its variants tend to get overloaded with Residents during peak hours, so you may want to check the Mesh Sandboxes if you're having trouble logging into Mesh City or if everything there looks like large triangles instead of meshes.
- Continue to Uploading a Mesh to get started on adding your own meshes to the region.
