Case Study - Example wood crate using materials
Jump to navigation
Jump to search
Preparatory materials
- A materials-enabled Second Life viewer (3.6.0 or later, in beta as of 2013-06-04), and a graphics card capable of using the Advanced Lighting Model in Graphics Preferences
- Wood Workshop - A free seamless wood texture generator.
- GIMP 2.8 - A powerful, free image manipulation program.
- gimp-normalmap - A plugin for GIMP that facilitates the creation of normal maps. This requires a little bit of work to install, so make sure to follow the instructions carefully.
- Paint.net Normal Map Renderer - A plugin for Paint.net to render a normal map from a 2d image.
- You can get the completed example crate for free from the Second Life Marketplace at: https://marketplace.secondlife.com/p/Materials-Example-Crate/4968980
Step 1: Generate a wood texture using Wood Workshop

- Start Wood Workshop
- Under Render Resolution, choose 512x512
- Under Category, choose Uncut Wood.
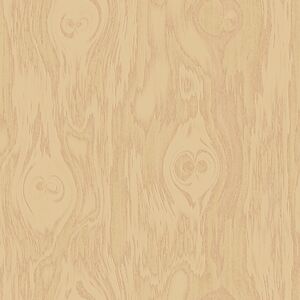
- Under Texture, choose a wood type. For this exercise, I chose Maple.
- Play with the various sliders until you are happy with the appearance of Final Texture
- I recommend leaving Scale at zero for this exercise, but the other sliders all produce interesting results.
- I also recommend avoiding the Effects for this exercise.
- When you're ready, choose Render > Render Texture from the top menu bar. This generates your final high-resolution wood texture.
- Choose File > Export Image to save your wood texture to a .jpg file on your computer.
Step 2: Adding some details to the wood texture

- Open the wood texture in GIMP
- Immediately create a new layer by choosing Layer > New Layer... from the top menu bar; you won't want to accidentally draw on your original wood texture!
- The new layer should be the same size and shape as the wood texture (512x512), with a fill type of Transparency.
- Select a border area around the image by dong the following:
- Select the entire image by choosing Select > All from the top menu.
- Select a 32 pixel border by choosing Select > Border. Enter "32" into the Border selection by box. Click OK. A rectangular border around the image should now be selected.
- Choose Filters > Render > Clouds > Solid Noise and click OK to use the default settings; this fills the border with a cloudy metallic gray pattern.
- Add a text layer (the text tool does this automatically when you try to insert text). In this case, I used the word EXAMPLE using the Sans Bold font at 100pt and then rotated the layer 45 degrees.
| Note: Remember that the purpose of this exercise is to generate dynamic shadows on your texture using normal maps; the practice of using "baked" lighting and shadows is unnecessary and would actually look strange when used in conjunction with normal mapping! |
Step 3: Creating the normal map
Adding some details

Save your work here! We're going to be making some major changes to the image that we need to revert later. Make sure you keep your layers intact.
Experiment with different selections and brush shapes to create interesting textures. The normal map plugin responds to differences in color to determine simulated depth.
- Before creating the normal map, I added some black dots on the corners and random white brush strokes to the border layer. These created some additional interesting effects in the normal map, but I reverted the changes immediately after I exported the normal map.
Generating the normal map

- Choose Image > Flatten Image to flatten all layers into a single image.
- Choose Filters > Map > Normalmap
- Play with the various options in the Normalmap window until you get a normal map that you like. You can preview the 3D results in realtime by clicking 3D Preview.
- Click OK to convert your image to a normal map
- Click File > Export to save the normal map to your computer as a PNG file. The default export options work well.
- After exporting, immediately revert back to your saved texture (as of the end of Step 2) with all layers intact.
Step 4: Creating the specular map

Again, make sure to save your work before beginning this step! We're going to be making more changes that will need to be reverted.
- Select the base (wood texture) layer.
- Choose bucket fill tool and set the fill color to black
- Increase the threshold to maximum and fill in the wood texture layer; it should become completely black.
- Select the border layer
- Choose the rectangle select tool and use the guides we created earlier to select the area inside the guides.
- Choose Select > Invert to invert your selection, causing only the border area to be selected.
- Choose the bucket fill tool and set the fill color to white.
- Fill the border area with solid white using the bucket fill tool
- Select the text layer if you have one
- Choose Select > None to clear your selection of the border area
- Use the bucket fill tool to fill each letter of your text with solid white
- At this point, your entire image should be black and white
- Export your specular map image to your computer by choosing File > Export.
- After exporting, immediately revert back to your saved texture (as of the end of Step 2) with all layers intact.
Step 5 (optional): Adding finishing details to the diffuse map texture

For fun, I tried to add some dirt and weathering effects to the diffuse texture before trying it out in Second Life.
- With the text layer selected, experiment with the eraser tool. Try different brushes and opacity levels for a faded, scuffed paint look.
- Select the border area and play with Colors > Colorize; remember that this area will be shiny like metal in the final product. I went with a dark bronze color.
- Play with different airbrush shapes and sizes to add some dirt smudges to the remaining surface on the wood layer. Try to be subtle; this texture will be repeated on every face of the object and any conspicuous markings will look strange if they're noticeably repeated.
- Save your final product -- We're almost done!
Applying diffuse, normal, and specular maps in Second Life


- Log into Second Life using a materials-enabled viewer (3.6.0 or later)
- Find some land where you can build, such as land you own or a public sandbox
- Create a cube prim. The example crate from this exercise is a 0.75m x 0.75m x 0.75m cube.
- Right-click the cube and choose Edit.
- Click the Texture tab of the Build Tools window.
- Choose Texture (diffuse) from the material type dropdown if it isn't already set.
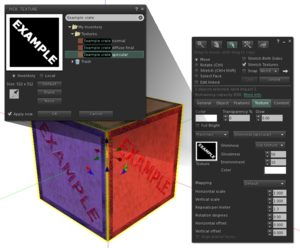
- Click the box above the word Texture to open the Pick: Texture window.
- Find and click your diffuse map to apply it to the cube, then click the OK button.
- Back on the Texture tab of the Build Tools window, click the Alpha mode dropdown menu and choose Alpha blending or None. The alpha blending mode is only available if your texture has an alpha channel (transparency).
- Choose Bumpiness (normal) in the material type dropdown.
- Click the box above the word Texture to open the texture picker and choose your normal map texture, then click the OK button.
- Click the Bumpiness dropdown on the Build Tools window and choose Use texture.
- Choose Shininess (specular) in the material type dropdown.
- Click the box above the word Texture to open the texture picker and choose your specular map texture, then click the OK button.
- Set Glossiness to 50. Glossiness determines how reflective your specular map will be.
- Set Environment to 10. Environment adds shininess to the entire object.
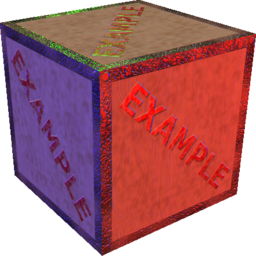
You're done! Admire your normal and specular-mapped object.
