Mesh/Exporting a mesh from Maya
Video Tutorial
Chair
<videoflash type="youtube">1fb2LP1n-Lk|640|505</videoflash>
Avatar demo
<videoflash type="youtube">vdjJcjLjHqs|640|505</videoflash> <videoflash type="youtube">vu6bbKQDc7Y|640|505</videoflash>
Basic workflow
Create a box (or monkey or teapot or hippo)
Reduce polygons
Apply textures
Scale to meters
Some features of Maya can go a bit wonky when you change the units from centimeters to meters, so as an alternative, leave Maya alone and build as if centimeters were meters, then after exporting, open the .dae file in a text editor. Find this: <unit name="centimeter" meter="0.01"/> and change it to this: <unit name="centimeter" meter="1.0"/>
It is now scaled correctly when you import to SL.
Export to COLLADA
Export as FBX (Maya 2011 and Later)
When using Maya 2011 or later, it is recommended to export your files as fbx files and then convert them to dae. Otherwise, you may get errors, particularly with models that have multiple texture faces or an increase in polycount when uploading to Second Life. This brief tutorial will show you the process for this.
<videoflash type="youtube">-hjhRPIbO1w|560|315</videoflash>
Import to SL
Best practices
Forum thread on Maya best practices
Bones and rigging
This is only the most basic steps to get your started, but should allow you to have a working, rigged item to wear on your avatar from maya. Once you get the rigged skeleton into maya with the default avatar obj. (or any mesh object) There are a couple of very simple steps:
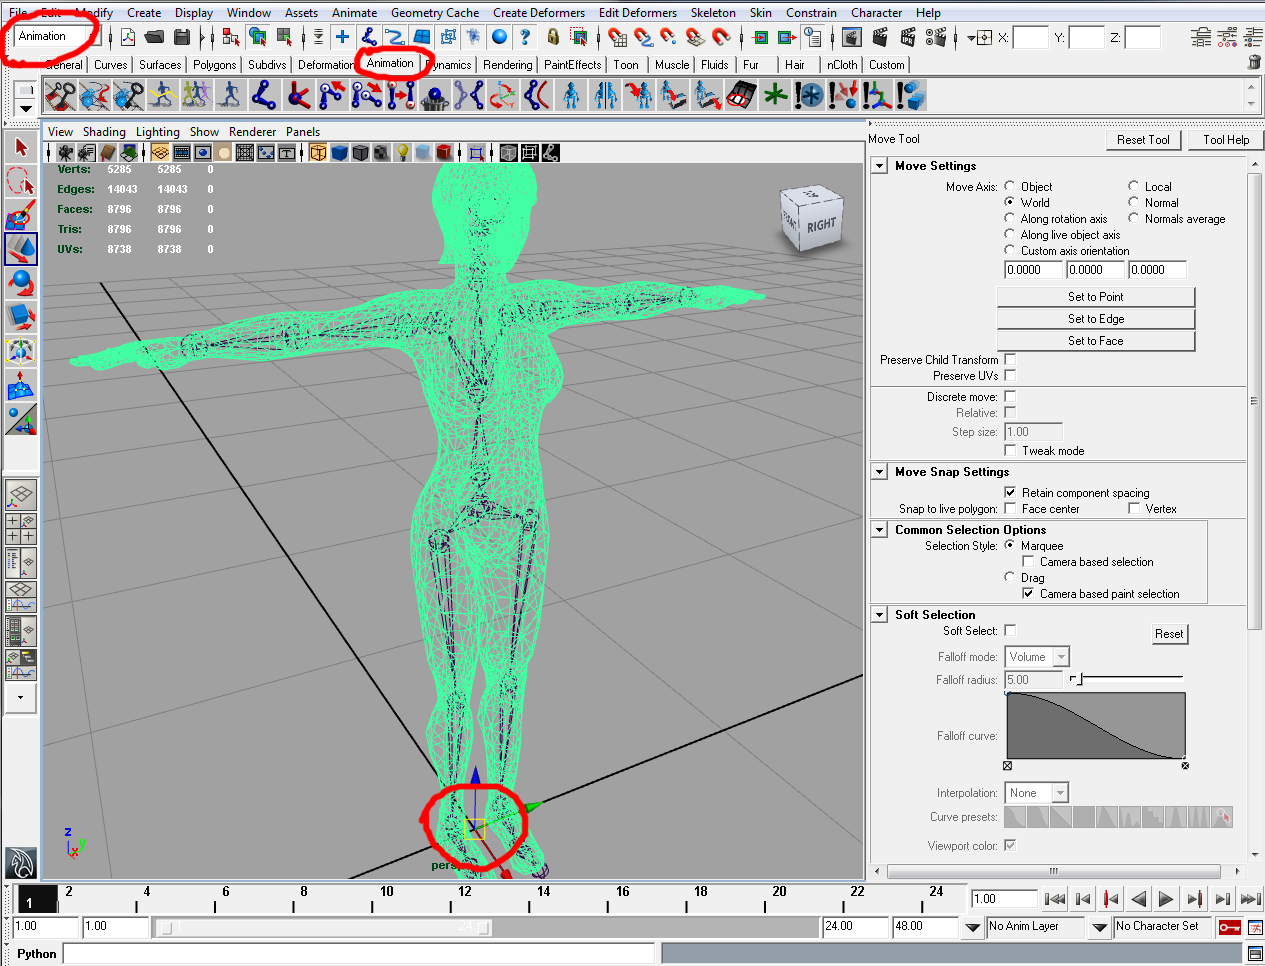
1. Make sure you are in the animation panel, and have the animation shelf selected.
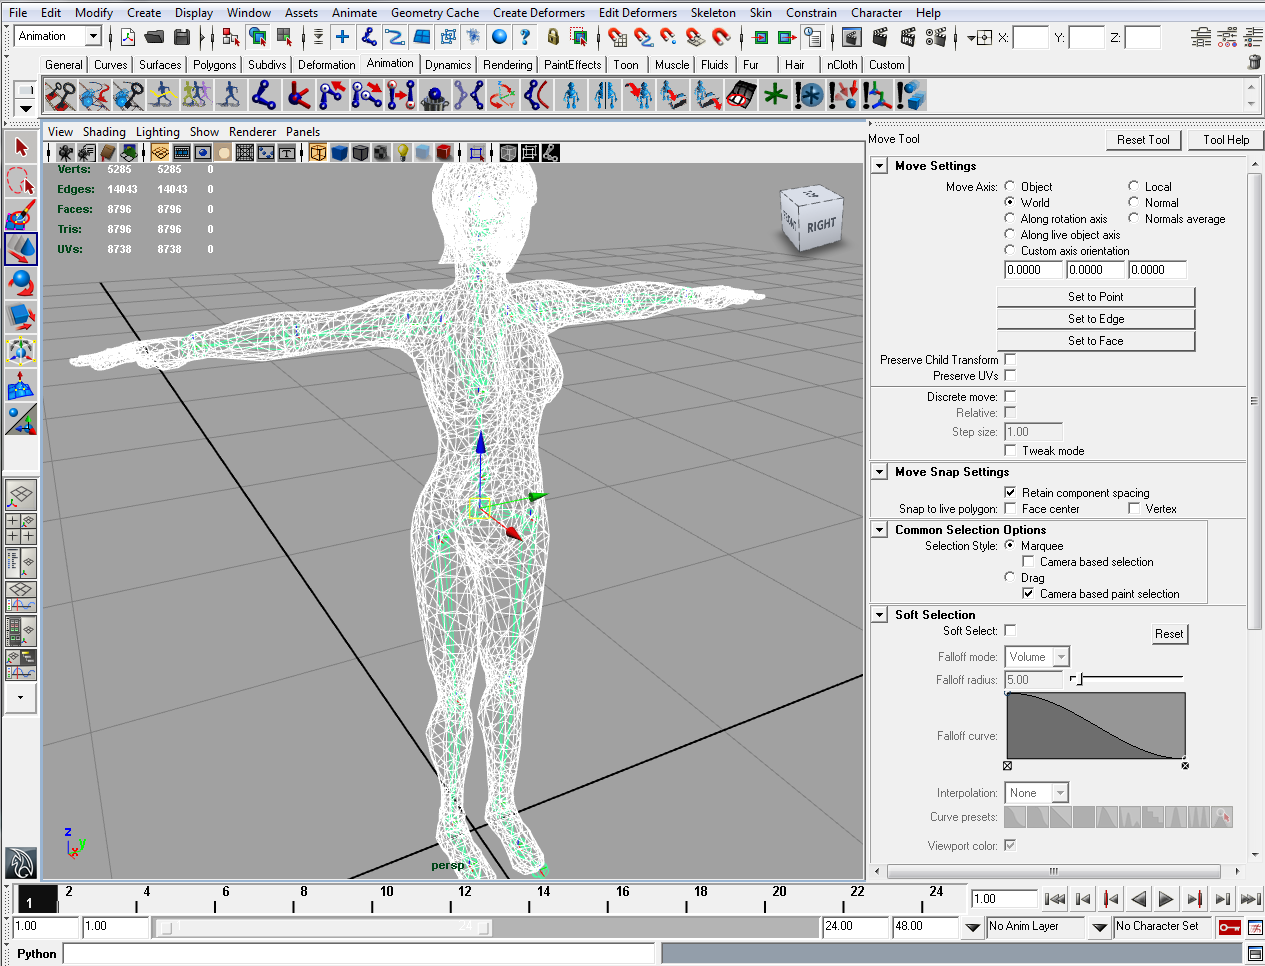
2. Position your mesh obj. so that it is as close to your avatar skeleton as possible, scaling where needed. If you are importing the default mesh avatar, the zero point should place it exactly where it needs to be over the skeleton when you import. If is is not an avatar, but an item of clothing, etc., then position and adjust the item(s) as close as possible to the position that they will be when worn on your avatar. I helps to also have the avatar mesh imported and positioned properly as a guide to scaling and positioning of the items you want to rig. You can delete the avatar object once you are done adjusting the items.
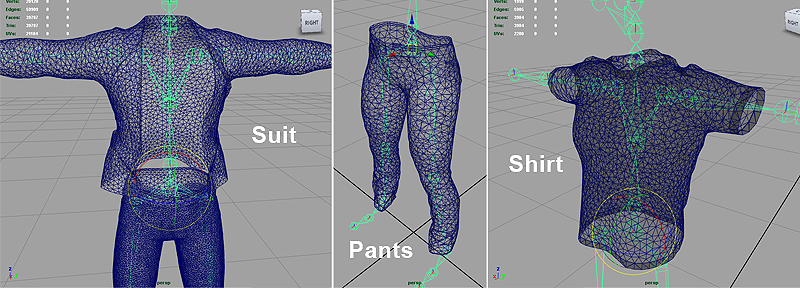
NOTE: The items above were used for testing only and are extremely high polygon count. Items should be optimized to much lower; As a general guideline, consider limiting a single worn item of clothing to no more than 2000-4000 polys.
3. Select your mesh obj. or avatar mesh obj.
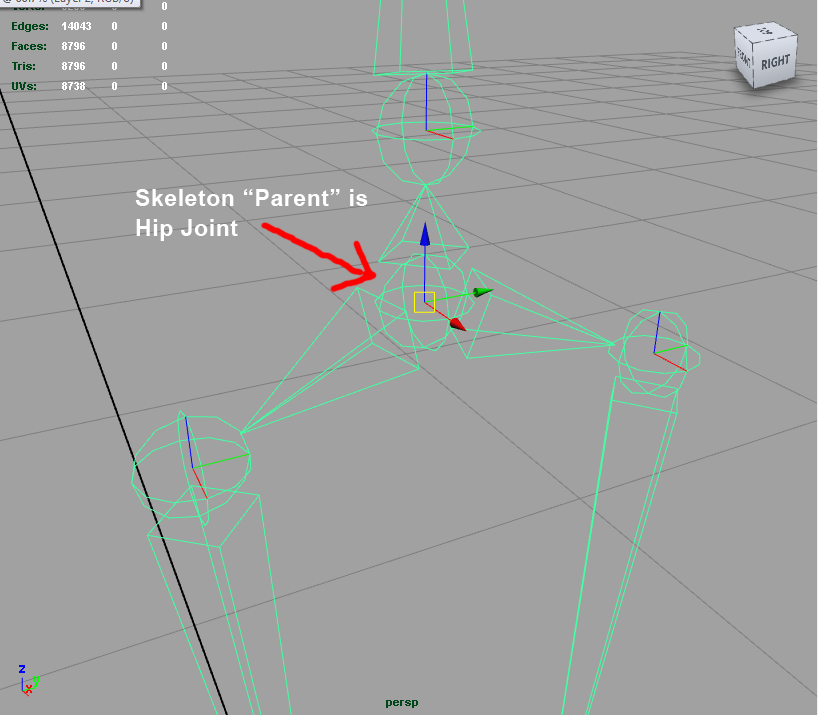
4. Select your skeleton from the center hip joint (this is the main or "parent" joint for the entire skeleton, and defines the zero position for any animation) Once selected, the entire skeleton should show as selected.
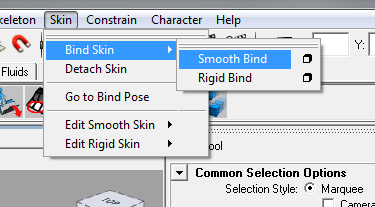
5. Go to the SKIN menu at the top of the maya interface. Select SKIN > BIND SKIN > SMOOTH BINDING (rigid bind will not work with SL) The small options box for Soft Bind is also where you will go later on to adjust weights and rigging properties.
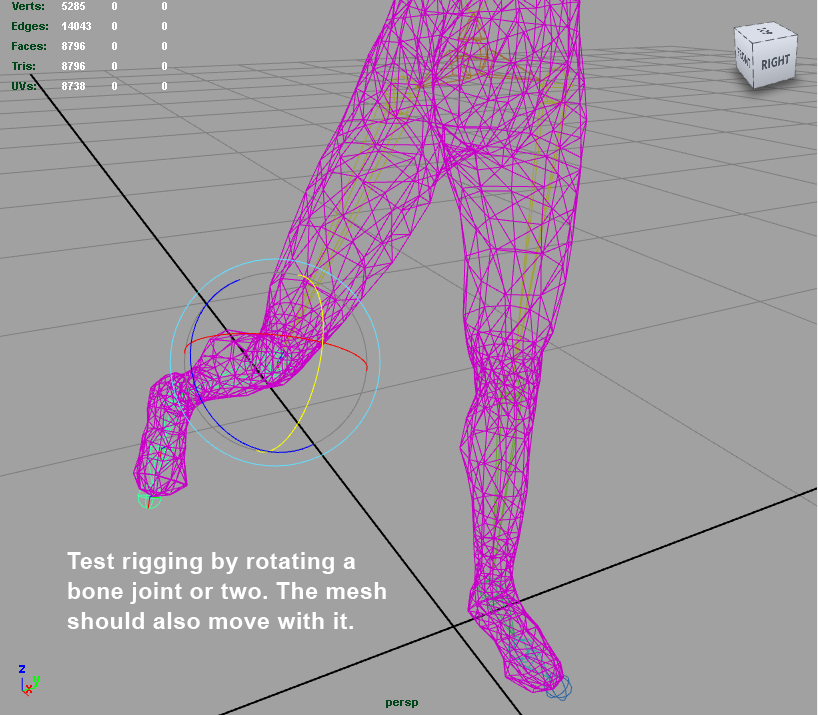
6. Once you have selected SMOOTH BIND your avatar skeleton and the mesh avatar should both show as selected, with the skeleton bones showing a variety of colors. It is now rigged. As a test, you can select one of the bones, like the thigh, and using the rotate tool rotate the leg bone; If rigged properly, you will notice your mesh polygon shape moving along with your bone rotation. Make sure you UNDO this step prior to exporting in step 7 below so that it is back in its original position.
7. While both are still selected, EXPORT them as collada DAE file. You will need to have the collada plugin installed and running for this to work. Make sure that your UV mapping and any adjustments to the UV map have been done PRIOR to skinning the object to the skeleton.
8. Open SL and import your mesh DAE file, then rez the item on the ground. At this point, most likely it is very small, unless you accounted for the scaling from maya to SL. As stated above: Some features of Maya can go a bit wonky when you change the units from centimeters to meters, so as an alternative, leave Maya alone and build as if centimeters were meters, then after exporting, open the .dae file in a text editor. Find this: <unit name="centimeter" meter="0.01"/> and change it to this: <unit name="centimeter" meter="1.0"/>
9. Import your images texture(s) for the mesh, place it on the item, and take it back into inventory.
10. Wear the item by right clicking it in your inventory and selecting WEAR, ATTACH or selecting ADD to your current outfit. It does not matter where your attach point is on the skeleton, as you rigged the item to the parent hip joint. It will automatically be worn correctly.
NOTE: You will most likely need to wear an alpha underneath the item so that your avatar body will not show through. You may also create a custom alpha texture to apply to the various alpha segments that you check if you edit the alpha clothing item while worn.
Gotchas and workarounds
As of viewer Second Life 3.0.0, If you rig a piece of cloth lets say a jacket or a skirt, the "calculate weights" button disappears when you check "skin weights" if you don't at the smooth bind options window unchecked "remove unused influences"... As described by MW Boa http://community.secondlife.com/t5/Mesh/I-am-able-to-upload-full-body-rigged-mesh-not-able-to-upload/m-p/1057877
Optimization techniques
Tutorial links
Basic Rigging in Maya - Video Tutorial by resident Sae Luan : http://cutepoison.net/tutorials/maya-tutorials/rigging-mesh-in-maya/
UV Mapping in Maya 2015 - Video Tutorial by resident Sae Luan : http://cutepoison.net/tutorials/maya-tutorials/uv-mapping-in-maya-2015/
