Building Tools
| Help Portal: |
Avatar | Bug Fixes | Communication | Community | Glossary | Land & Sim | Multimedia | Navigation | Object | Video Tutorials | Viewer | Wiki | Misc |
The Second Life viewer had built in tools to create and modify objects, a process known as "building". Once created, objects can be stored in your personal inventory, shared with other users, or placed somewhere within the 3D world.
Objects are made of one or mare "primitive shapes", or prims, which can linked together to form more complicated items. Each prim has one or more images called "textures" applied to it's surfaces, and can contain an unlimited number of items inside it, including other objects.
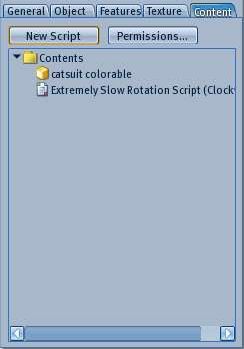
The items placed inside an object can include software scripts, animations, sounds, and additional textures. These can make an object perform an almost unlimited number of actions.
This page discusses the Tools floating windows. For software scripts see the Linden Scripting Language (LSL) Portal. See also (Other portals related to building).
Opening the Tools
There are 5 build tools selectable either from the top menu or within the Tools window: Focus, Move, Edit, Create, and Land. Within the window, the 5 icons along the top will change tool selection. The bottom portion of the window has 5 tabs which work with the edit tool to change a selected object.
Any of the following will open the Tools floating window. Note the Tools window has no title. You must have permission to create new objects on the land parcel or edit an existing object for the tools to work. You should also be familiar with the camera controls to effectively build.
- Top menu View > Build
- Top menu Tools > Select Tool > (any of the 5 tools)
- 3D view right-click an existing object Context Menu > Edit which will select that object for editing.
- 3D view right-click on an existing object or on bare land Context Menu > Create which will create a new object at that location.
- If local chat is closed, keyboard B
You can click-drag on any empty part of the window to move it to a different screen location.
Focus Tool
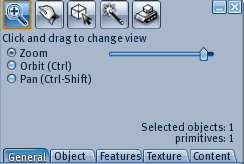
This tool changes where the camera is looking in the 3D view. Selecting this tool will change your mouse pointer to a magnifying glass. Clicking any point in the 3D view will center that point.
Zoom - Using the scroll wheel or slider will zoom the view in or out.
Orbit - Click-drag will rotate the view around the selected point. This option can be selected temporarily by holding the Ctrl key.
Pan - Click-drag will slide the view parallel to the current viewing plane. This option can be selected temporarily by holding Ctrl + Shift.
Move Tool
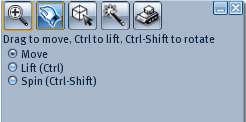
This tool moves a selected object smoothly. Selecting this tool changes the mouse pointer to a hand.
Move - Click-drag will move the object smoothly in the horizontal plane.
Lift - Click-drag will move the object smoothly parallel to the current viewing plane.
Spin - Appears to work the same as Move.
Edit Tool
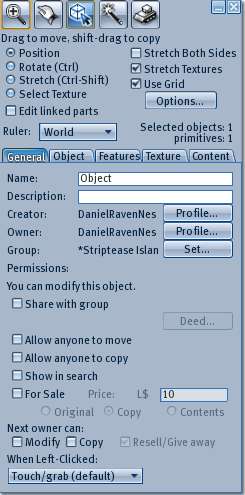
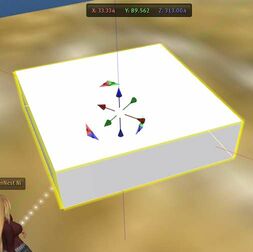
This tool edits the details of an object. Selecting this tool changes the mouse pointer to an arrow with a crossed axis symbol. Clicking an editable object will highlight the object with a yellow outline and show edit axes and coordinate values on the screen. A slightly out of date introduction video can be found at YouTube.
Position - The axes are color coded: red for X (east), green for Y (north), and blue for Z (height). The axes are centered on the center of the object, which gives it it's "location" measured in meters from the bottom south west corner of the map region. An object is considered "in" a region or parcel if it's center point is within the boundaries, even if part of it overhangs.
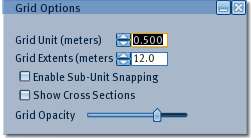
There are small arrows at the intersection of the axes, which when click-dragged will move the object along that axis. There are two-color triangles near the arrows, which when click-dragged will display a grid and move the object within that plane.
Rotate - Also selected temporarily by holding the Ctrl key. Changes the axes to three rings. Click-drag on a ring will rotate the object along that plane. Sliding outwards will show a circular ruler, which will rotate the object in 1/64th of a circle (5.625 degree) steps.
Stretch - Also selected temporarily by holding Ctrl+Shift keys. Changes to small cubes on the sides and corners of the object. Click-drag of a colored cube will stretch the object in one dimension. Clicking the grey corner cubes will stretch the object in all three dimensions, with the opposite corner staying fixed.
General Tab
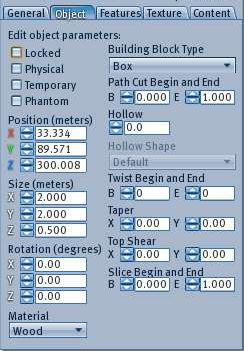
Object Tab
Sculpted Shapes - See this 3D modeling guide for detailed information.
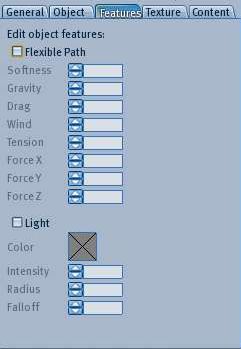
Features Tab
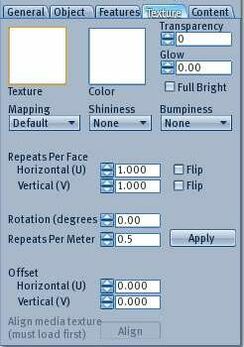
Texture Tab
Once textures are loaded into Second Life's database, they cannot be edited. Instead, you use any one of the many Texture Tools such as the GIMP, Photoshop, or even MS Paint.
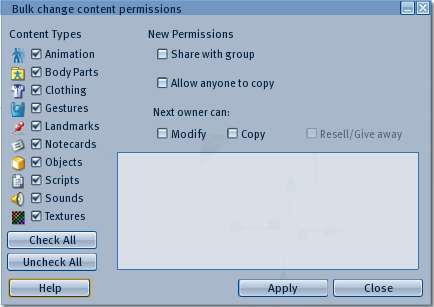
Content Tab
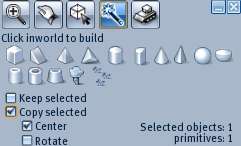
Create Tool
Land Tool
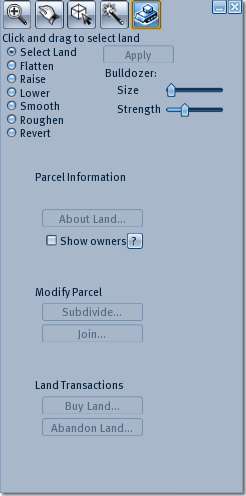
This tool lets you modify the land parcel itself as opposed to objects located on the land. Selecting this tool will change your pointer to a bulldozer.
A land parcel shares part of the terrain map for the region it is located in. The top portion of this tool allows you to reshape the terrain within the Limits for the region and adjoining land parcels. The terrain map is continuous, meaning you cannot tear holes in it. So any changes you make to one part of it will smoothly connect to neighboring parts.
The first button is used to select an area via click-drag across the land in the 3D view. A yellow outline will appear to show your selection. The other buttons will then give you the option of applying the change to the whole selection using the Apply button, or using the Bulldozer to adjust areas as you click-hold over them. Arrows will appear over the area you are working on, and the longer you hold the mouse button, the more the land will change. The Size and Strength sliders control how effective the bulldozer is.
Estate owners can also change the texture (images) for the surface, by changing the terrain map. External tools exist to edit it. Some special plants are created internally in the viewer software, and only count for one prim each. They can be found in the Library part of your inventory. Other plants are normal objects.
